I saw a request earlier this week from my team where they are trying to update a specific field in Jira, in this case, “labels” for hundreds of Zephyr tests. While the task is simple, the big question here is whether it is worth the time of an individual to do this monotonous task manually one by one. Definitely, this is not going to be the last time, so why not automate this boring stuff?
Here’s how I did it.

Solution: Jira API
Jira provides extensive REST API to perform every action that users could perform in the user interface. In this case, in order to send the request and validate the response, we would use POSTMAN!!! And all we need is a PUT request like the one shown below.
| PUT: /rest/api/latest/issue/jira-123 |
| Request Headers – Content-Type: application/json Accept: application/json Authorization: Bearer xxxxxx |
| Request Body: { “update”: { “labels”: [ { “add”: “Automated” }, { “remove”: “Manual” } ] } } |
| Response: 204 No Content |
This request will simply remove the label “Manual” from the Zephyr test and add the label “Automated” to the sample issue jira-123. If the label value needs to be dynamic and read from the input data sheet, add a variable similar to the Jira issue id.
But, how about repeating this request several hundred times?
POSTMAN collection to the rescue!!!
This can be achieved by creating a simple collection that reads data (Jira issue ids) from an MS Excel or CSV file, submits the PUT request, validate the response, and also double-checks if the label has been updated correctly in Jira.
STEP 1:
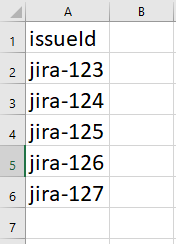
Create the Input Data Sheet – It can be a simple CSV file, say issueIds.csv with just 1 column of data with the header “issueId”.
STEP 2:
Update the PUT request to use the data from the datasheet. Instead of the actual Jira issue id in the request, use the variable {{issueId}}. The variable used should match the column header in the datasheet.
PUT: /rest/api/latest/issue/{{issueId}}
STEP 3:
Add Tests to confirm that our request(s) worked. In Postman, you can achieve this by adding JavaScript code, something like the one shown below which checks if the response code is 204.
pm.test("Test updated successfully", () => {
    pm.response.to.have.status(204);
    }
);
STEP 4:
While the previous step does confirm that the PUT request was successful, it doesn’t assure you that everything is updated correctly in Jira. How about sending a GET request to check if the labels are updated as expected?
| GET: /rest/api/latest/issue/{{issueId}}?fields=labels |
| Request Headers – Content-Type: application/json Accept: application/json Authorization: Bearer xxxxxx |
| Response: 200 Success |
Once the response is received with the issue details, it is advisable to validate the response automatically as well similar to the test created in Step 3. Below sample JavaScript code will check two things namely, whether the labels contain ‘Automated’ and it doesn’t contain ‘Manual’.
const responseJson = pm.response.json();
pm.test("Labels contain 'Automated'", () => {
  pm.expect(responseJson.fields.labels).to.include('Automated');
});
pm.test("Labels doesn't contain 'Manual'", () => {
  pm.expect(responseJson.fields.labels).to.not.include('Manual');
});
STEP 5:
Run the Postman collection. Voila!
- Note 1: If a different set of issues need to be updated, update the input data sheet.
- Note 2: If a different value needs to be updated, say “fix version” instead of the labels, add the required field in the request body for PUT request and update corresponding tests.
Additional References:
- https://developer.atlassian.com/server/jira/platform/rest-apis/
- https://developer.atlassian.com/server/jira/platform/jira-rest-api-examples/
- https://testingchief.com/wp-content/uploads/2024/01/bruno_1.6.1_x64_win.zip
If you found this interesting, you can find more such articles here on quality assurance, test automation, tools, and processes. Don’t forget to leave your comments here or on Twitter @testingchief. Thank you!


